Since I went to Italia last month, I bought back a whole bunch of goodies. I still had some tortellonis frozen and decided to take them out and prepare them the way I had them in Italia with my friend. A nut and cheese sauce :)
So here is my take on the recipe:
Tortelloni con Noci e Pecorino Romano
Ingredients:
250grs spinach and ricotta tortelloni
100grs nuts
100grs pecorino romano
1/2 cup of white wine
salt
oil
In a large pot, bring water and salt to a boil. Add the tortelloni and cook for a few minutes.
In the meantime, add oil to a pan and heat. Add the nuts. Roast for a few minutes.
Add the white wine and let reduce. Add a bit of cheese.
Remove the pasta from the water and add to the pan.
Add the remaining pecorino and serve.
Such a fast and simple recipe but filled with flavor. The mixture of pecorino and ricotta topped with some nuts just makes the perfect pasta combination.
Hope you enjoy it :)
Monday, 2 May 2011
Thursday, 28 April 2011
Fideos con Langostinos
This combination is pretty interesting. I had a plate of this on holidays in the Pirineos 2 years ago and loved it. It is not a very common dish and is usually made in Southern Spain. I honestly would have never thought of using soup noodles to make a "paella" style dish. Since I bought lots of shrimps this week as I am hosting a Sushi Workshop tomorrow (more on that VERY soon :) ), I decided to use some of them for a quick supper.
In Spain, gambas and langostinos are 2 different type of shrimps. The gambas are usually a reddish color raw as the langostinos are the typical bluish color. The gambas are also smaller hence more work to get the meat! I usually use langostinos when cooking.
Fideos con Langostinos
Ingredients:
15 raw shrimps
1 cup of soup noodles
2 cups of fish broth or water
1 tbsp of paprika
salt
1/2 onion
2 garlic cloves
oil
This dish is so simple to make. Peel the shrimps and reserve the heads and skins.
In a small pot, heat the water or broth and add the shrimp's heads and skins. Boil for about 10 minutes. It will be a rich orangy color.
In the meantime, in a pan, heat some oil.
Chop the onion and mince the garlic.
When the oil is ready, add the onion and garlic. Sweat for a few minutes.
Add the noodles and paprika. Mix well to coat and let cook for a few minutes. The noodles will take a rich color.
Add the broth the the pan.
Mix well and let reduce. When there is almost no broth left, add the shrimps and salt.
Mix. When the noodles are al dente, remove from heat and let it rest for about 5 minutes.
Add a few shrimps for presentation and Voilà!
Buen provecho a todos :)
Wednesday, 27 April 2011
There is nothing like homemade BBQ sauce
Trust me. Once you go homemade, you never go back! Ok, unless you're in a jiffy and need some quick fix, you will not look at store bought BBQ sauce the same way again. It is super easy to make as well. Who would have thought?! You can spice or sweeten it up and give it your very own twist.
I had made a bunch for some ribs I made on the weekend. Since we had friends over, I got kinda side tracked and forgot to take a few pics so it was not blog worthy BUT I did get the sauce pics :) At least I did something right :)
So for a quick supper fix, BBQ chicken wings with some seasoned fries :) It was Game Night :) Well, techincally... the game started at 1am here and we were both long gone by then. The intention was there and that was what mattered :) I am sure the boys heard us as they won Game 6 and are now heading into Game 7 tonight :) GO HABS GO!!!!
Homemade Honey BBQ Chicken Wings with Seasoned Fries
Doesn't that look just amazing :)
Ingredients:
1kg chicken wings (I asked mine chopped)
200gr grounded tomato
1/2 small onion
1 garlic clove
1 tbsp of balsamic vinegar
1 tbsp brown sugar
1 tsp of worchestershire sauce
1 tbsp of fine herbs
1 tbsp honey
water (if necessary)
2 potatoes
1 tsp paprika
1 tsp garlic powder
1 tsp salt
1 tsp oregano
oil
Ok, so I had made the double of sauce but only wrote down the quantities that were needed for the chicken wings portion. This quantity gives you about 1/2 cup of BBQ sauce. Oh, some people use ketchup. I personally don't like ketchup (that stuff is just too sugary for my taste) and would rather use tomato sauce. If you use ketchup, the cooking time reduces and I would actually not add the brown sugar.
Finely chop or ground the garlic and onion. In a pan, heat oil. When ready, sweat the onion and garlic.
Add the tomato sauce, heat for a few minutes.
Add the vinegar, sugar and worchestershire sauce.
Mix well. Add the honey and herbs when the sauce starts to bubble.
Mix well. Let cook and reduce for about 20 minutes or more if needed.
If you want, you can blend it to make a softer texture. I like mine chunky :)
When you reuse the BBQ sauce, you might need to had some water to it to liquify it a bit. It tends to get pretty thick when cold.
Preheat your oven at 225C.
Place the wings skin side up on an oven dish.
Bake for about 5 minutes. Remove and flip them. Brush with the BBQ sauce.
Cook for about 10 minutes. Remove and flip again to have the skin side up. Brush with BBQ sauce.
Return to oven and cook for about 5 minutes.
In the meantime, heat the frying oil.
slice thinly the potatoes.
When the oil is ready, fry the potatoes until they are lightly golden.
As soon as you start frying your fries, turn the oven at broil and toast those chicken wings!
Remove the fries from oil and drain the excess off.
In a bowl, mix the fried potatoes, paprika, garlic powder, salt and oregano. Toss well.
The wings should be turning out superb now. Remove from the oven.
Just look at those babies:
And that's what you call: Finger licking good!!!!!!
Hope you get to enjoy them as much as we did :)
Monday, 25 April 2011
Potaje de Garbanzos y Acelgas
Easter week is called Semana Santa in Spain. Although most Spaniards are not very religious, they have huge processions in the streets and events. It is pretty impressive and can actually shock new comers. Think major Ku Klux Klan outfits walking down the street, people carrying religious emblems on their shoulders... they really go all out. They also have typical dishes to be served like the famous Torrijas :) For those not familiar to this Easter dessert, it is bread soaked in milk, fried and covered with cinnamon. It makes me think of French Toasts. Another dish is the Potaje de Vigilia. This dish is a stew composed of chick peas, spinach and cod. I had some at work and really liked it. Since I had some chard left, I decided to make my own version of the Potaje de Vigilia with meat instead of cod and chard instead of spinach.
Potaje de Garbanzos y Acelgas
Ingredients:
200grs chick peas
200grs chard
1 punta de jamón (Spanish ham bone)
1 small onion
1 garlic clove
1 peeled tomato
150grs ham (lacón)
2 tbsps parsley
water
oil
Soak the chick peas overnight in water. They will double in size. Rinse them well before using.
In a large pot, bring water to a boil. The quantity to use really depends on how liquid you want your stew. Since David is not a big fan of beans, I decided to use more water to make more of a soup for him. When the water is boiling, add the chick peas and punta de jamón.
This is what a punta de jamón looks like. Jamón is Spanish prosciutto. It is quite the spanish delicassy. The difference with the italian version is that they are cured for longer, hence the better taste... sorry... but I have to be honest. Spanish ham is better than prosciutto (and I have italian blood and we have always had prosciutto at home). The punta is the small piece of the leg before then foot that is quite hard to remove the meat from. It is filled with flavor so people chop it and use it to make broths.
When the water boils again, reduce the heat. Cover and cook for about 1hour.
Chop the onion, garlic and tomato. In a pan, heat oil. When ready, sweat the onion and garlic.
Add the tomato. Cook until the tomato can be easily crushed and forms a purée.
Blend the sauce with a hand mixer.
When the stew has been heating for 1 hour. Add the chard.
Let them reduce in size. Cut the ham into bite size pieces. Add the tomato sauce and ham.
Mix well. Remove the punta de jamón from the stew. From the piece, remove the meat, chop into small pieces. Add them to the stew and add the parsley.
Let the flavors mix together. Cooking time should be about 1h30. It really depends on the type of chick peas you used. Taste them to make sure they are tender enough.
And there you go. My own version of the Potaje de Vigilia. It came out pretty good indeed :)
I used more broth for David's portion.
Enjoy :)
Wednesday, 20 April 2011
Greek Time!
Montreal is a great city :) One of its best assets is the food culture and diversity. You can find any type of food on any street. David and I miss this aspect of Montreal. In Spain, people are really proud of their food culture (with reasons) but they have a hard time embracing international food. Younger generations are more open to this concept and will venture more out of the Spanish spectrum but the older one is really hard to convince.
Montreal has a very big greek culture. There are so many greeks there! This can only mean one thing: amazing greek food on every street corner (depending on the neighborhood, most commons: Parc X, Chomedey or St Laurent). Who does not enjoy a gyro or souvlaki pita with tzatziki. :) David and I have a pending appointment at Marathon Souvlaki in Laval :) Can't wait! We went to a greek restaurant last week and although the food was great, they didn't have the typical souvaki pita. It was a more refine restaurant... and the tzatziki just wasn't the real deal. Mind you, the yogurt was amazing but I have never seen so little cucumber or garlic in a tzatziki. Oh well, it subsided our thirst for greek, but left us wishing for Marathon souvlaki :)
So, after that little trip leaving a urging taste of garlic and cucumber in our mouths, guess what we had for supper on saturday: Chicken Souvlakis with Tzatziki :) David and I were eating the tzatziki like no tomorrow. Our friend was there and she loved it as well.
Souvlaki is marinated meat (chicken, pork or lamb) in oregano, lemon and oil mostly. The meat comes out amazing :)
Chicken Souvlakis and Tzatziki
Ingredients
500grs chicken breasts
1 onion
4 garlic cloves
1 tbsp oregano
1 tbsp lemon juice
4 individual natural greek yogurts
2 tbsps oil
1 tsp of white wine vinegar
2 cucumbers
1 tbsp fresh dill
salt and pepper
skewers
oil
The day before, cut into cubes the chicken breasts and slice the onion and 2 garlic cloves. Place them in a ziploc bag and add the oregano, oil, vinegar, pepper, garlic cloves and onion. Mix well. Marinade in the fridge overnight.
Preheat the oven at 180C.
For the sauce, drain the yogurt from excess liquid. Normally you use a cheesecloth but since I don't have any, paper cloth works just fine. I place the papercloth in a colander over a bowl and pour the yogurt. Works great. You can leave it overnight or only a few hours. I left it about 1 hour since I didn't have much time. My tzatziki was a tiny bit more liquid than usual but the taste is the same.
In the meantime, remove the chicken from the ziploc.
Make skewers with the chicken. Place on a oven dish. (If you have a BBQ, please use it! Tastes awesome!)
ETA: I cooked the skewers in a heated pan last time and the taste was a lot more moist than in the oven. So, I rectify the cooking process: cook your souvlakis in the pan (for those that do not have a BBQ)! :)
Since I don't have a BBQ, I place them in the oven at the highest height. Cook the chicken souvlakis for about 15 minutes.
While the chicken is cooking, finish off the sauce. Honestly, the sauce can be done the day or 2 before. Helps the flavors to blend together. Remove the yogurt from the colander and place into a bowl.
Shred the cucumbers and the 2 remaining garlic cloves. The smaller the pieces, the better. Cut the dill.
Add the cucumbers, garlic, dill, salt and pepper, a bit of oil and a drop of lemon juice.
Mix well. Taste and rectify if necessary.
Your chicken should be ready by now. If you want to give it a grill look, broil it for a few minutes before removing.
And there you have. A great greek meal to satisfy our hunger. A true delicacy made from my little kitchen. Hope you enjoy it as much as we did!
Sunday, 17 April 2011
Salmon Trout in Spain
Ok, I have been pretty busy and didn't get much cooking done until Saturday. We went out on thursday and friday with friends so no cooking for me... Oh well, I made up for it :).
In Spain, you don't find much fresh water fish. Most of them are from sea water (kinda obvious since the country is surrounded by sea). When we went to the grocery store, I got 2 Salmon Trouts for 2.50€. Quite the steal :) I really like trouts. I guess it brings me back to the days when we used to go fishing with my family. I would love it :) So everytime I eat fresh water fish, it just brings me back to those old memories. We are going camping with friends at Sandbanks this summer and will be going fishing, I can't wait!!!!
Ok, back to my kitchen. I decided to do lemon trouts and serve it with rice. Since feeding David can be like feeding a kid, I added the veggies to the rice. He liked it and confirmed that if I would have made it separate, he might not have eaten them. Wise wife ;)
Salmon Trouts with Chard Rice
Ingredients:
2 Salmon Trouts
1 onion
2 garlic cloves
1 lemon
Fish spices (Thyme, sea weeds, sea salt, parsley...)
1 cup of rice
1/2 cup of white wine
2 cups of chard
2 1/2 cup of vegetable or chicken broth
1 tbsp of rice spices (or any spices you prefer)
salt and pepper
oil
Preheat your oven at 180C. Slice half of the onion and lemon.
In a oven dish, place a few onion slices and the trout on top (this prevents the trout from soaking into the wine at the bottom). Place a few slices inside the trout with 2 lemon slices. Cover them with 2 lemon slices each and the remaining onion slices. Sprinkle the spices on top. Add the white wine to the plate. I love adding wine as it helps flavor the fish and keeps it moist while it cooks.
Cover with aluminium foil and cook for 20 minutes.
While the fish is cooking, prepare the rice. Dice the remaining onion and garlic cloves. Heat oil in a large pan. When ready, sweat the onions and garlic.
Slice the chard. Add to the pan.
Cook until it reduces.
Add the rice and rice seasoning. Mix well.
Add the broth.
Remove the fish from the oven.
In Spain, you don't find much fresh water fish. Most of them are from sea water (kinda obvious since the country is surrounded by sea). When we went to the grocery store, I got 2 Salmon Trouts for 2.50€. Quite the steal :) I really like trouts. I guess it brings me back to the days when we used to go fishing with my family. I would love it :) So everytime I eat fresh water fish, it just brings me back to those old memories. We are going camping with friends at Sandbanks this summer and will be going fishing, I can't wait!!!!
Ok, back to my kitchen. I decided to do lemon trouts and serve it with rice. Since feeding David can be like feeding a kid, I added the veggies to the rice. He liked it and confirmed that if I would have made it separate, he might not have eaten them. Wise wife ;)
Salmon Trouts with Chard Rice
Ingredients:
2 Salmon Trouts
1 onion
2 garlic cloves
1 lemon
Fish spices (Thyme, sea weeds, sea salt, parsley...)
1 cup of rice
1/2 cup of white wine
2 cups of chard
2 1/2 cup of vegetable or chicken broth
1 tbsp of rice spices (or any spices you prefer)
salt and pepper
oil
Preheat your oven at 180C. Slice half of the onion and lemon.
In a oven dish, place a few onion slices and the trout on top (this prevents the trout from soaking into the wine at the bottom). Place a few slices inside the trout with 2 lemon slices. Cover them with 2 lemon slices each and the remaining onion slices. Sprinkle the spices on top. Add the white wine to the plate. I love adding wine as it helps flavor the fish and keeps it moist while it cooks.
Cover with aluminium foil and cook for 20 minutes.
While the fish is cooking, prepare the rice. Dice the remaining onion and garlic cloves. Heat oil in a large pan. When ready, sweat the onions and garlic.
Slice the chard. Add to the pan.
Cook until it reduces.
Add the rice and rice seasoning. Mix well.
Add the broth.
Cook for about 15 to 20 minutes until the rice is tender. Add salt and pepper.
Remove the fish from the oven.
And there you have it. A healthy and cheap meal that pleases everyone, or almost everyone... those that do not fancy having to remove the fishbones will definately do not like this dish!
Monday, 11 April 2011
A Little Bit of Pesto
It is the weirdest feeling but I have not even lifted a finger in my own kitchen since last thursday! A whole weekend went by and I did not even need to turn on the stovetop. Between the leftovers and the outings we had, there was no need to :) Although I love to cook, a little break is always welcome once in a while :).
I forgot to take my camera to David's aunt's house for the wonderful roasted lamb they prepared. It was simply amazing! A 12kg lamb roasting for 5 hours on the fire. What more can you ask? The whole family (about 30 people) gathered together for this little celebration of the nice weather. We accompagnied it with Parmesan Eggplant (Melanzane alla parmigiana), greek salad, cesar salad, ensaladilla rusa and turkey salad. The sun was also invited and did grace us with his presence; a beautiful 25C :). Later on, we went to a Gallego restaurant for some awesome seafood (Navajas, Berberechos, Pulpo, Calamares, Merluza rellena...) with our fellow Canadian friends to bid farewell to Hani who's moving back to Canada, destination Winnipeg. Sunday was lunch at a cousin's house for ribs. So, as you can see, our weekend was filled with amazing food, but not from my kitchen (although, I did prepare the greek salad and eggplants ;)).
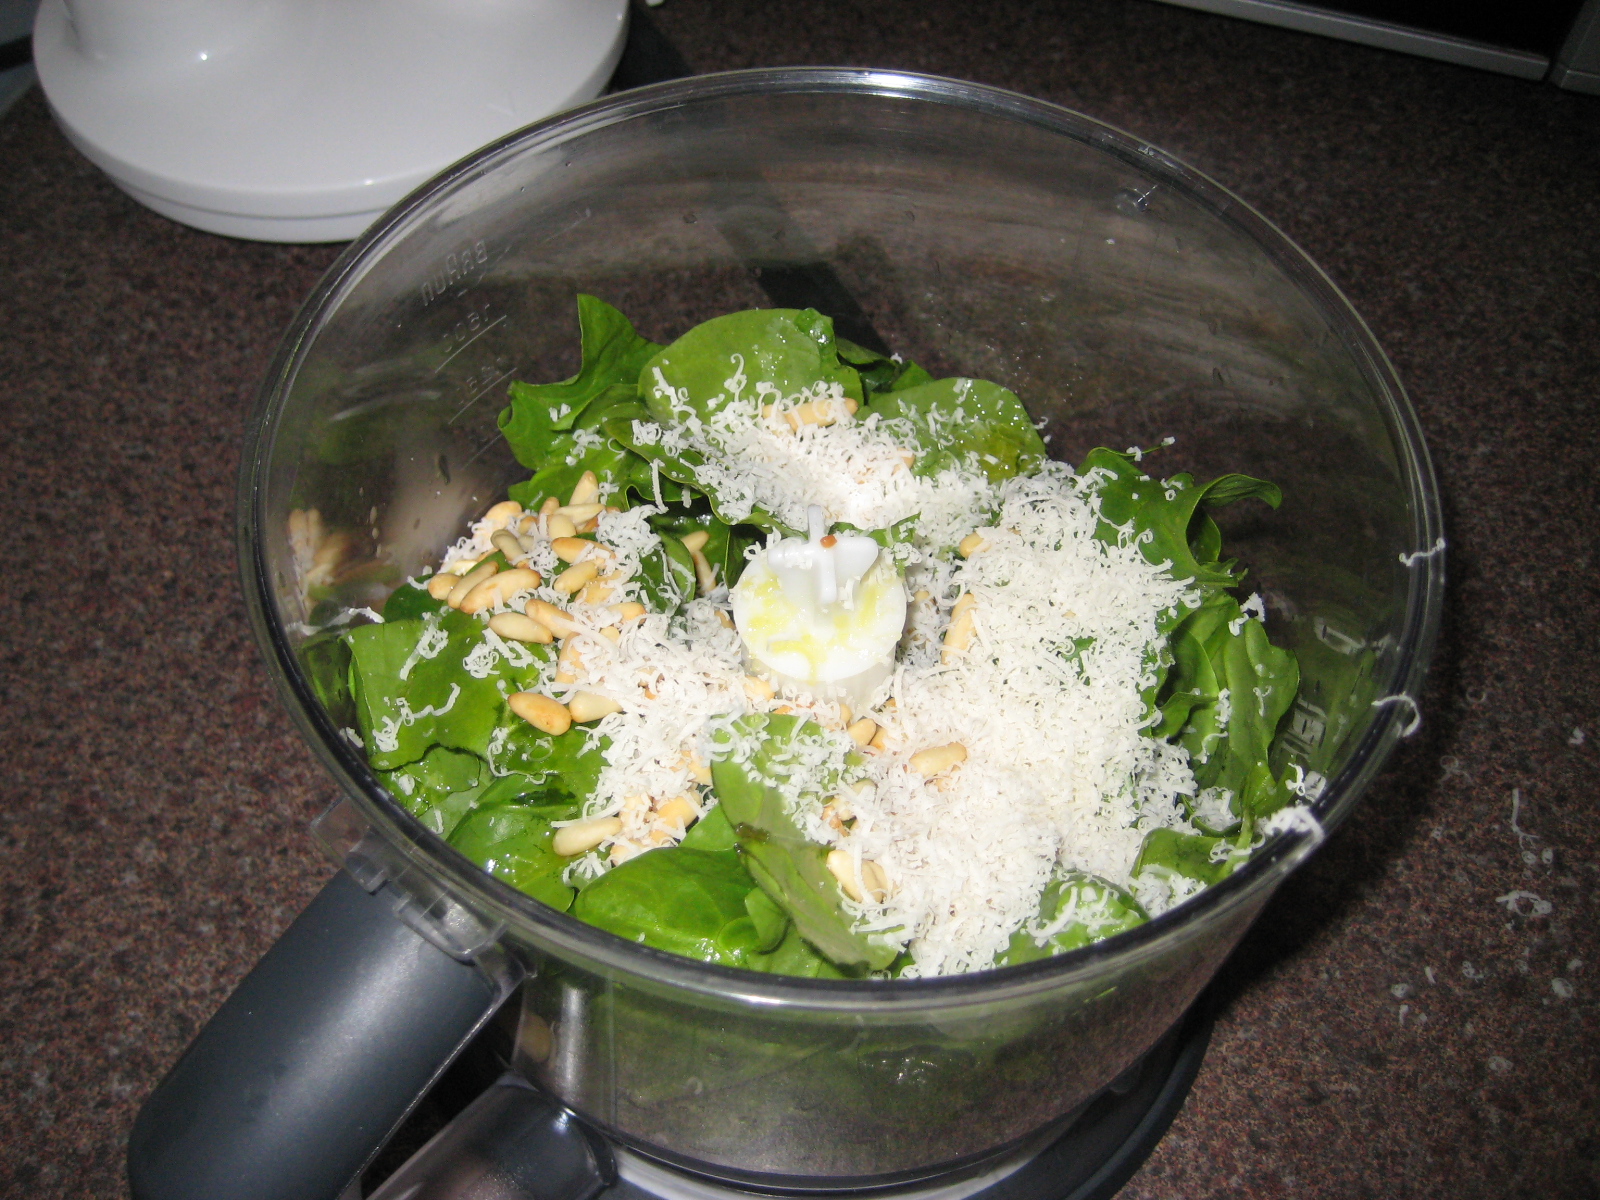
So back to my fridge and tiny kitchen. I had some spinach that I really needed to use and didn't feel like cooking them. At first it was going to be a typical catalan dish with pine nuts and raisins but I decided to just make a pesto using my pine nuts. David is not a big fan of pesto because he finds that basil tastes too strong. I figured that if I use the spinach, it will tone it down. I was right :) David liked it. I chose to add berberechos (a type of clam) to the pasta as I had it in Italy and loved it. My supper was ready before I knew it. Who knew cooking could be this easy?!
Spinach Pesto and Clams Linguini
Ingredients:
250grs of linguini
1 can of berberechos or clams
1 garlic clove
1 cup of spinach
2 tbsps of pine nuts
2 tbsps of parmesan cheese
2 tbsps of oil
salt
1 tsp of lemon juice (optional)
In a large pot, boil water with salt to cook the pasta. When it boils heavily, add the pasta and cook until al dente.
While the pasta is cooking, in a mixer, add the spinach, parmesan cheese, roasted pine nuts (roasted for 5 minutes in the oven), garlic clove, lemon juice, oil and salt.
Mix well. Add a bit more oil if needed. Remove from mixer. Looks like regular pesto here :)
Add the pesto to the drained pasta.
Mix well. Add the berberechos (I add them afterwards because mixing the pasta to coat it evenly with pesto will destroy the clams...)
Mix.
And there you have it. Simple :) Pesto is a great cooking sauce as it can be used with lots of different things, not only pasta. Have fun with it and experiment. Only good things can come out of it.
I have officially found my new pesto recipe approved by David :)
Subscribe to:
Posts (Atom)