Ah, the famous KD (Kraft Dinner for the non North Americans)! Some people could not live without it! I have to admit I still have a few boxes in my pantry from Canada that we use once in a while. You aren't American or Canadian if you have never eaten this stuff haha. The KD box comes, just like the Hamburger Helper, with the pasta and the sauce mix. You add a bit of milk and butter and done. It's that simple!
I had some leftover chicken breast from the roasted chicken and brocoli that was starting to get old. What better way to use them than with mac&cheese? Usually I do some garlic mayo and make some chicken wraps but the brocoli just didn't work well in that mix. So off to the mac&cheese I went. I figured that it would be much like the hamburger helper. Milk and cheese :) After a bit of googleing, turns out a bechamel mixed with cheese is the base for the sauce. Off to cooking I went!
Chicken and Brocoli Mac & Cheese
Ingredients:
500grs macaroni
1 brocoli
1 cup cooked chopped chicken
2 cups of milk
1/2 cup of cream
2 tbsps of flour
2 tbsps of butter
1 tsp nutmeg
1 tsp of garlic salt
1 cup of cheddar
1/3 cup of pecorino romano
2 tbsps of breadcrumbs
salt and pepper
water
Chop the chicken if not already done and cut the brocoli into florets.
In a large pot, bring lots of water and salt to boil. When boiling, cook the pasta until al dente. Don't overcook it as it will continue to cook in the oven. If you want, you can rinse the pasta with cold water to prevent it from cooking and sticking.
At the same time as the pasta is cooking, in another pot, steam the brocoli until it turns a bright green color. Some people add it to the cooking pasta but I find it removes a lot of the flavor from the brocoli compared to steaming it.
In a saucepan, melt the butter and add the flour. Mix to form the roux. Add the hot milk (heated in the microwave) and mix well to form the bechamel. Add the nutmeg.
When the milk sauce is done, add the cheese.
Mix well until all the cheese has melted. Add the salt, pepper and garlic salt.
Add the chicken and brocoli to the pasta.
Mix and add the sauce.
Mix well to coat the pasta. Transfer into your oven dish. Add a bit of grated pecorino romano and breadcrumbs.
Broil in the oven until a nice golden crust has formed.
Another delicious homemade meal that David approved! He even said it was better than KD :)!
Thursday, 7 April 2011
Wednesday, 6 April 2011
Is that a Chicken Sitting in the Oven?
I just love that phrase! Props go to my Spanish friend Luz when she saw my roasted chicken actually sitting in the oven :)
This method is now my only method for roasting a chicken. Simple, cheap and JUICYYYY! I have never eaten a juicier roasted chicken. There is something about having it sit on the beer can (wrapped in aluminium fold if you prefer) that gives it all the "funk".
My mom used to have this "sitting up" roasted chicken rack but we had never used it with beer until I bought one to bring back to Madrid. I loved how the skin would not bathe in the pan juices and would be crispy all around. Turned out the roaster is made especially to fit a beer can in. I told my Mom and she's been doing it this way since then as well. Those that don't have the roasting rack, I have succesfully done it without it, the chicken sitting on the can alone, and it works great. You just gotta be careful and make sure that it's balanced; last thing you want is to clean your oven of beer.
I did this roasted chicken as the second dish from our Sunday lunch. It was a great combination with the Fabada Asturiana :)
Roasted Chicken with Baked Potatoes and Gravy
Ingredients:
1 whole chicken
8 potatoes
2 or 3 tbsps of Montreal Chicken Spices (paprika, garlic salt, celery salt, pepper...) or your own rub
1 beer can
2 tbsp of flour
2 tbsp of butter
parsley
oil
Preheat your oven at 180 C.
Take you beer can, open it and drink about 1/3 of it ;). Ok, if you are not thirsty, reserve it for later. Place the can into the rack (if you are using one).
Take you spices or rub and rub it well onto the chicken inside and out. When done, place the chicken onto the rack.
Place in the oven and cook for about 1 hour. It really depends on your chicken's size. You can always use a meat thermometer.
About 20 minutes into the cooking, peel and slice the potatoes.
Add salt, pepper, a bit of the rub from the chicken, parsley and oil. Mix well. Add them to the oven dish you are cooking the chicken onto. I always use a dish even though there is a recipient under the chicken as it always drips on the sides.
Here is my sitting chicken in the oven with the potatoes. :)
Remove from oven and let rest for AT LEAST 10 minutes. Trust me. Do not start cutting it before because alllllll the juices from the meat will fill your cutting board. I learned by mistake; I basically add about 1 cup of liquid all over my cutting board and counter! I seriously had never seen so much juice come out of a roasted chicken. If you wait, you'll have some but a lot less and the juices will remain in the meat.
To prepare the gravy, melt the butter in a sauce pan. Add the flour and mix until a roux is formed. Add the drippings from the recipient of the chicken and some of the beer from the can. Mix well. Depending on the thickness you want, add some more beer. Add parsley and a bit of the rub. Taste and adjust if needed. Best gravy ever :)!!!
And serve. Here is a pic of the chicken breast plate.
An amazing and easy roasted chicken :)
Tuesday, 5 April 2011
My favorite Spanish dish: Fabada Asturiana
I just love this dish. I am a big food addict and love anything, but this one is just heaven :). We went to Asturias last year, loved it so much that we returned with my parents when they came to visit us in Sept to show them this wonderful area of Spain. Let me just tell you, they were amazed and loved it as well. The food and the beauty of the place is worth a visit. People tend to concentrate on Madrid, Barcelona and the Costa del Sol when coming to Spain, but IMHO, they are missing the best: the North. Between Galicia, Asturias, Cantabria and Pais Vasco, there is so much to see and enjoy. Every corner of Northern Spain is a jewel yet to be discovered and their culinary skills are unbeleivable. Seafood, fish, embutidos (cold cuts), cheeses... you have it all! I truly recommend a visit to the North of Spain and, trust me, you will not regret it.
Fabada Asturiana, as the name states, comes from Asturias. It is a slow cooked pot of fabes (large white beans) with chorizo, morcillo (blood sausage), tocino (lard) and lacon (ham). The simpliest thing: the best results :)
Remember how I mentionned that David was a picky eater? Well, he doesn't like beans... and I love them! So, I can barely cook any otherwise I am stuck with them for days (even though I love them... eating the same stuff for days is quite boring). I took advantage that we had friends over for lunch and made it as the first plate. I like this dish since the beans are quite big and can be removed when serving David's plate. He eats the meats and broth and the few beans that fall into his plate :) He didn't complain one bit!
So for you all, here is a quick look into this wonderful part of Spain: Asturias.
Fabada Asturiana
Ingredients:
1 chorizo
1 morcilla
1 piece of tocino
1 or 2 lacon pieces with bone
250gr of fabes (white beans)
1 onion
1 garlic clove
saffron
water
In a large bowl, soak the beans in cold water overnight.
Overnight.
In a creuset or large pot, place the rinsed off (removing the water they soaked in helps to remove the "gasiness" of the beans) beans covered by water. Bring to a boil. There will be a film of mousse forming on top, remove it. Add the meats (you can see the lacon pieces, morcilla, chorizo and tocino on this pic), onion and garlic.
Bring to a boil. When the water is boiling, reduce heat to low and slowly cook for about 2 hours. The chorizo and morcilla will slowly release their colors and flavors. About 30 minutes before it is done, add the saffron.
When the beans are cooked. Remove the meat, cut into pieces and return to the pot.
Serve directly at the table.
This is such a traditional dish in Asturias and has been around for centuries. No wonder; its taste says it all! :)
Monday, 4 April 2011
Une bonne poutine! Y'a pas grand chose qui bat ça!
Hahaha J'pouvais pas vraiment commencer ce post d'une autre façon! Fallait bien un peu de québécois sur mon blog, non? :) Té pas une vraie québécoise si à 5000kms tu manges pas une bonne poutine de temps en temps! Ok, tu dois t'habitué à pas avoir de crottes de fromage mais c'est mieux que rien, croyez-moi :)
Ok, so for the non french speakers: POUTINE TIME! If you are Canadian, you know what it is, have tried this Quebec specialty and of course, loved it :) and for the Spanish people, you have probably tried it at my place and loved it as well. Trust me, it is the perfect comfort food :)
We are going to Montreal for 4 weeks in June and god I am craving one of those (be it at La Banquise, Costco, au casse-croûte Paul et Suzanne sur Gouin or the good old Ashton). Can't wait!
Here is a pic of my Dalton poutine (with ground beef) at Ashton from Sept '09:
Miam! Looks so delicioussssss!!
So, David called his friend up when I told him I was going to make a poutine and told him to come over and try it. Result: He loved it! hehe
The real poutine calls for fresh cheese curds; you can see them on my Ashton poutine above, under the groud beef. It is kinda hard to find these in Spain. I have been working on my cheese curds recipe and it wasn't bad last time. So, in the meantime I use mozza or other stringy cheeses, works well.
I also usually make the gravy myself as it is super easy (a little roux (butter and flour) with broth (homemade or storebought)) but I was being lazy. I also have a ton of poutine sauce mix packs so why not use them? I'll post my roasted chicken and gravy tomorrow and you have a gravy recipe there if you want.
Poutine is such a great meal. You can add chicken, beef, sausage, bacon, peas, turkey... basically anything and it will still be awesome :) Have fun with it!
Poutine
Ingredients:
6 potatoes
150 grs of cheese curds (or any grated cheese if you don't have)
300ml of gravy (homemade or 1/2 pack of sauce mix)
Ok, this is super easy. Potatoes, cheese and gravy. I am really not making any complicated food these days ;)
Peel and slice the potatoes into fries. In a large pan or wok (I like to use it as it doesn't splash while cooking and you can shake it without spilling), heat oil. Use a deep fryer if you have one. When the oil is boiling and almost smoking, add the fries. Cook until golden.
In a sauce pan, heat gravy or sauce mix.
When the fries are done, place them on the plate, add the cheese and pour gravy on top.
That's it! Done!
Hope you all enjoy this little piece of Quebec heaven. Bon appétit :)
Sunday, 3 April 2011
Grilled Cheese or Sandwich Mixto?
I really wasn't going to blog this, come on... grilled cheese... it doesn't get simplier than that, but the controversy between the Canadian and Spanish version makes it pretty interesting. What is the best way to eat it? When Spaniards were telling me to eat a sandwich mixto, I had no clue what they were talking about. When they explained to me that it was bread with cheese and ham inside... I said: Oh, a grilled cheese but with ham! And then, it was their turn to have the confused look on their face. I had to explain what a grilled cheese was and they were surprised: Only cheese inside.. how boring! Lol To each their own! But I personally prefer my grilled cheese as I am not really fond of regular ham. Give me some lomo, jamon or anything else and I'll happily eat it. I guess I had too many cold sandwiches in my school days that I can't really stand the stuff anymore...
Ok, since we were going hiking in the afternoon, I had to prepare something fast. My toast bread was getting old so I decided to use it. David jumped at the idea of bread and said he wanted some grilled cheese / sandwich mixto :). Unlike me, he actually likes the ham inside the grilled cheese... So I decided to compensate, add something else. I brought back some Coppa from Italy (the top part of lomo) and sliced some up to use :) Best decision ever! The ageing of the meat went perfectly with the cheese :)
Another controversy: olive oil or butter. I hate to admit it to my Spanish friends but there is nothing that beats butter on toast bread! Sorry... olive oil is for baguettes or other breads but not toast bread. Especially if you are going to do a grilled cheese. Leave the oil and take out the butter. You won't regret it :)
Grilled Cheese / Sandwich Mixto
Ingredients:
8 bread slices
4 cheese slices (Tranchettes for Spaniards and Singles for Canadians)
8 slices of coppa or any cold cut
butter
Melt the butter and brush it onto one side of each slice (the side that will be grilled).
Flip them around and place 1 cheese slice and 2 meat slices on each.
Close the sandwich. Heat a small pan, when hot, place the sandwich to grill.
When browned, flip around.
Remove from pan when the other side is brown as well and there you have it! My version of a grilled cheese!
I served it with a parmesan, cherry tomatoes salad. Oh, and my new addiction: Creamy balsamic vinegar. BEST THING EVER! I love it. Such a nice garnish; not too vinegary with a creamy texture. Makes for great presentation and with an awesome taste :)
All in all, a great super fast and easy meal. We were out of the house in no time and heading to the mountains for our almost 4 hours hike.
Oh, and for those that think that Madrid is so warm, here is a picture of Santo enjoying the snow on our hike about 1 hour north of Madrid in the mountains (Yes, he is the black spot on the snow in the middle lol). Enjoy :)
Saturday, 2 April 2011
'Cause you never can get enough squid...
Right? I think I could have squid every day and not get bored of it. Fried, with rice, pasta... there are so many ways to prepare this wonderful seafood. One of the famous Spanish ways to make it is "relleno": stuffed. You can basically fill it with anything: meat, shrimps, seafood, veggies... In order to honor my second country ;), I decided to give it a try with a seafood filling. I had some chipirones (smaller version of squid) and started working. A coworker told me to try it with a red pepper sauce, so that's what I did.
Chipirones Rellenos
Ingredients:
6 chipirones
2 palitos de mar (fake crabmeat)
1/2 small red onion
2 mushrooms
1 tbsp of breadcrumbs
1 red pepper
1 pear tomato
1 garlic clove
1/2 cup of water
1/2 cup of white wine
salt and pepper
parsley
oil
This is a pretty small quantity, so I recommend doing more. The stuffed squid actually freezes well before cooking. Therefore, you can make a whole bunch and freeze it.
Dice the tomato, red pepper and garlic clove. In a saucepan, heat some oil and add the veggies. After a few minutes, add the water and wine. Cover and cook until tender.
In the meantime, clean the chipirones. When you remove the "wings" and "legs", keep them aside; they will be used in the filling.
** Super cool trick if filling squid: Flip the squid inside out. When heated, it will close off by itself and you will not need to use toothpicks. Flipping them is super easy. Using your finger, push the end of the tube inside of it and roll it out. Remove from your finger and there you have it. An inside out squid! (no pics but google it if you want)**
Finely chop the wings, legs, crabmeat, red onion and mushroom. In a skillet, heat some oil and add the red onion. Sweat for a minute and add the squid filling, crabmeat and mushrooms.
Cook for a few minutes.
Remove from the pan and let cool.
Add the salt, pepper and breadcrumbs. The breadcrumbs help the filling stick together (trick from my awesome coworker :) )
When the filling has cooled down, fill the squid. Do leave a bit of squid unfilled as they shrink while cooking.
In the same skillet, add some oil and cook the squid. Notice how they are starting to close off.
When you place the squid to cook, using a hand mixer, grind the sauce veggies together. Add some parsley and your sauce is ready. Add it to the pan.
Coat the squid with the sauce and there you have it. My sauce was a bit too thick for my taste but adding some water would have solved the issue.
Buen provecho :)
Friday, 1 April 2011
The Wonders of a Wok
I love my wok. You can really make wonders with it. Seriously, take any veggie, meat or fish, add a bit of sauce and voila. Easy and the best part: Healthy. You actually keep most of the veggies nutrients by not overcooking them. Since I had gone full italian for the most part of the week, I thought it would be a good idea to change things up a little :)
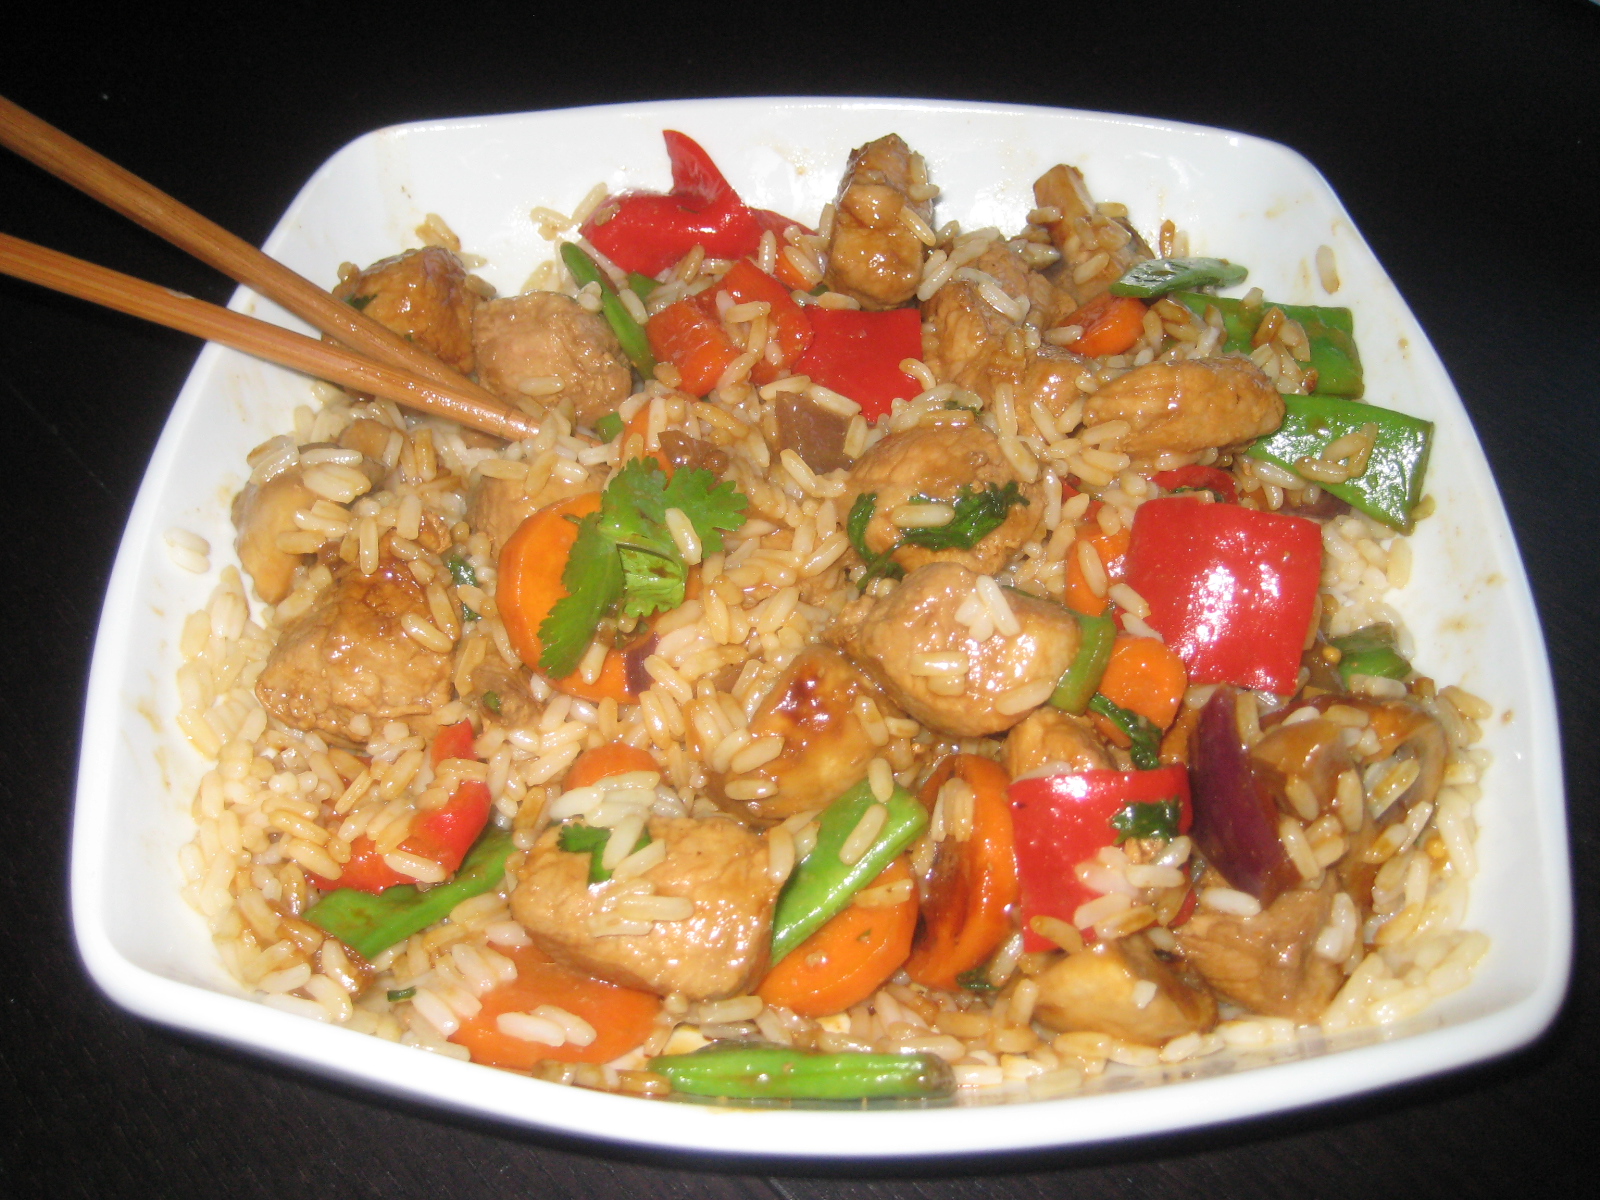
I marinated some pork cubes last night and, on my way home from work, I stopped by the fruiteria looking for some colors. The more colors, the better! Honestly, who doesn't like a colorful plate? A plate with lots of colors will actually taste a lot better than a plain dish. Our eyes really play a great deal when we eat; it isn't only about our tastebuds! So I got some red onions, red peppers, green beans, carrots and mushrooms. David is not a pepper fan and will not eat them if he can take them off his plate. He is a pretty picky eater so if I want him to eat certain veggies: creams or stuffed or sauces :) Oh well, I am practicing for when I'll have picky toddlers to feed :)
Pork and Veggies Teriyaki Stir-fry
Ingredients:
400grs of pork cubes
1 red pepper
1 small red onion
2 carrots
6 mushrooms
100grs green beans
1 cup of long grain rice
2 1/2 cup of water
1/2 cup teriyaki marinade sauce
2 tbsp of soya sauce
1 tbsp of mirin sauce
2 tbsp of fresh coriander
sesame oil
Marinade:
1 tsp of soya sauce
1 tbsp of mirin sauce
1 tsp of sesame oil
1 tbsp of teriyaki sauce
Dice into bite size pieces the onions, red pepper, mushrooms and green beans. Thinly slice the carrots.
Heat the wok. Add sesame oil and when ready, add the veggies. I tend to add the carrots and beans a minute or two before the rest as they take longer to cook.
Cook for a few minutes. I added a bit of water to the wok as the veggies were not releasing much. It helped them cook and actually prevented them from burning.
Remove the veggies from the wok.
Add some sesame oil and drop the marinated pork cubes.
Cook until the meat is no longer pink.
Add the veggies, coriander, mirin, soya and teriyaki sauces. Mix well. Let the flavors mix for a few minutes.
If your teriyaki sauce is pretty liquid, you might have to do what I did. Remove the meat and veggies, leaving the sauce at the bottom. Heat at high adding a bit of cornstarch. Thicken the sauce and re-add the veggies and meat. Here is the sauce thickening. You won't need to do this if your sauce is already thick. In Canada, I never had to but I guess the teriyaki sauce here is a lot more liquid!
Rice should be about ready at this point.
Place the rice on your dish. Serve the stir-fry on top. I always add some more soya sauce when eating :)
Doesn't it just look delicious with all of those colors?!
Enjoy :)
I marinated some pork cubes last night and, on my way home from work, I stopped by the fruiteria looking for some colors. The more colors, the better! Honestly, who doesn't like a colorful plate? A plate with lots of colors will actually taste a lot better than a plain dish. Our eyes really play a great deal when we eat; it isn't only about our tastebuds! So I got some red onions, red peppers, green beans, carrots and mushrooms. David is not a pepper fan and will not eat them if he can take them off his plate. He is a pretty picky eater so if I want him to eat certain veggies: creams or stuffed or sauces :) Oh well, I am practicing for when I'll have picky toddlers to feed :)
Pork and Veggies Teriyaki Stir-fry
Ingredients:
400grs of pork cubes
1 red pepper
1 small red onion
2 carrots
6 mushrooms
100grs green beans
1 cup of long grain rice
2 1/2 cup of water
1/2 cup teriyaki marinade sauce
2 tbsp of soya sauce
1 tbsp of mirin sauce
2 tbsp of fresh coriander
sesame oil
Marinade:
1 tsp of soya sauce
1 tbsp of mirin sauce
1 tsp of sesame oil
1 tbsp of teriyaki sauce
In a ziploc blag, prepare the marinade. Add the pork and mix well in order to cover all of the meat pieces. Let rest for a least an hour or overnight.
In a pot, drop the rice and water and cook. I added a bit of coriander to flavor the rice.
Heat the wok. Add sesame oil and when ready, add the veggies. I tend to add the carrots and beans a minute or two before the rest as they take longer to cook.
Cook for a few minutes. I added a bit of water to the wok as the veggies were not releasing much. It helped them cook and actually prevented them from burning.
Remove the veggies from the wok.
Add some sesame oil and drop the marinated pork cubes.
Cook until the meat is no longer pink.
Add the veggies, coriander, mirin, soya and teriyaki sauces. Mix well. Let the flavors mix for a few minutes.
If your teriyaki sauce is pretty liquid, you might have to do what I did. Remove the meat and veggies, leaving the sauce at the bottom. Heat at high adding a bit of cornstarch. Thicken the sauce and re-add the veggies and meat. Here is the sauce thickening. You won't need to do this if your sauce is already thick. In Canada, I never had to but I guess the teriyaki sauce here is a lot more liquid!
Rice should be about ready at this point.
Place the rice on your dish. Serve the stir-fry on top. I always add some more soya sauce when eating :)
Doesn't it just look delicious with all of those colors?!
Enjoy :)
Subscribe to:
Posts (Atom)