Pages

Wednesday, 19 September 2012

The famous Brownies

After many requests, I am finally posting the Brownies recipe.

Brownies are super popular in North America and have been taking over in Spain lately. People rave about them and cannot get enough of them! I have made this recipe many times and people keep on asking for more :)

Brownies


Ingredients:
3 eggs
1 cooking chocolate bar (about 180grs)
1/2 cup of butter
1 tsp vanilla extract
2 tbsps of cocoa powder
1 cup of chocolate chips (if desired)
3/4 cup of flour
1/4 tsp of salt
1 cup of white sugar

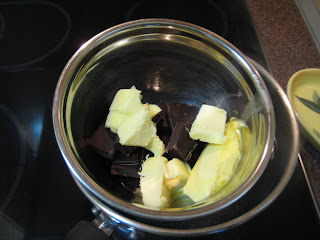
In a bain marie, melt the chopped chocolate and cubed butter.


When completely melted, remove bowl from bain marie.

Add vanilla extract.

 
Add the sugar and cocoa powder. Mix well.


Add the eggs one by one and mix well in between each. If you are like me and forgot (as by the picture), try mixing each egg before moving to the other.


Add the flour and mix well.


Time for chocolate chips.


Mix well and pour in a buttered oven dish. I also add sometimes some parchment paper at the bottom so it doesn't stick.


Cook for about 25 - 30 minutes. The trick to brownies is getting them done on the outside and still moist in the middle. Use a toothpick to check and when the middle of the brownie has some moist crumbles on it when you remove it, it is ready.

And here you have the already started wonder at our Canada Day Party this year!


Enjoy :)

2kgs of salt to cook?!

Of course! Who would have thought that so much salt would be so juicy and tasty! Everytime I make this dish, people rave about it. When I explain them the process, they cannot believe that such a simple way of cooking gives such amazing results.

Cooking with large salt can be done with many meats but especially fish. The most common version in Spain is Dorada a la sal (Dorada is called Gilthead Bream fish...)

So here goes

Dorada a la Sal


Ingredients:

3 doradas (or as many that fit in your oven!)
2 kgs of salt
water

Preheat oven at 180C.

Cover the bottom of an oven dish with salt.

Place the doradas on top.


Cover the doradas with salt and leave the eye uncovered. It is your temperature meter!


Sprinkle a bit of water to make it stick if it doesn't.

Cook in the oven for about 20 minutes and check the eye to see if it is done. If it is white, the fish is cooked!

Now comes the fun part: breaking the salt and removing the fish without getting too much salt inside. Go slowly at it until you find a good method. The salt should not stick to the meat.


Serve your fish as is on a plate with a side dish of salad, rice, pasta or potatoes.


And there you have it! I really recommend this recipe. The meat has an amazing taste and is super juicy!

Enjoy :)

I'm back to blogging!

As my post title states it: I'm back! After many months of not being able to dedicate any time to blogging (cooking was still acheived, not to worry), I am back and finally managed a few moments to update things.

I have FINALLY finished my MBA in June and have been really busy at work lately. I know, no real excuse but that's the only one there is :).

So, in order to kick off my blog again, I decided to post this lovely recipe with fall feeling: Pumpkin risotto.

I have been trying to incorporate more vegetarian dishes in our menu since it is cheaper and better for you. As well, since I eat at work and David eats home, he doesn't "absorb" as much veggies or fruits as I would like... men...

Pumpkin Risotto


Ingredients:


200grs of pumpkin
1 onion
1 garlic clove
1 cup of round rice
1/2 cup white wine
2 cups of vegetable broth (or chicken)
parsley
salt and pepper
oil

Remove skin and fillings from pumpkin and dice the meat.

Slice onion and garlic.

In a pan, heat oil. When ready, add the onion and garlic. Sweat for a few minutes.

Add the pumpkin.


Cook for a few minutes until meat starts softening.

In the meantime, heat the broth.

Add the rice. Mix well.


Add the wine and reduce.

Slowly add the broth as it gets absorbed by the rice.


 Add parsley, salt and pepper.


Mix well continuously.


And there you have it. A super easy, simple, cheap and healthy recipe for your table!

Enjoy! :)


Saturday, 28 April 2012

A Great Dessert Treat!

Since I already posted a David dish, let's keep on with the theme.

Now, onto dessert.

David is a true North American. Loves his junk food. When I found in the International section of our grocery store, marshmallows (not the Spanish weird version), he went crazy! We usually had to go to the American store to get them but now, easy access to the goodies. I am not a big fan, but a few roasted on the firepit in the summer sure are good!

He loves his rice krispies squares, and since I refused to make them, he went at it. And did pretty good! He is now the rice krispies squares maker in our house :)

As he has now offered for me to bring some at work and to take some pictures for my blog, here is the recipe:


Rice Krispies Squares


Ingredients:

1 bag of marshmallows (about 40)
6 cups of rice krispies
3 tbsps butter

Now, for this recipe, I was present and took the pictures :)

In a large pot, at low heat, melt the butter.

Add the marshmallows.


Mix until they start to melt.


And until they have fully melted.


Add the rice krispies and mix well.


Transfer to a dish that has been buttered.


Using waxed paper, shape the marshmallows.


Let cool off, cut into squares and enjoy!

There you have it:


Another great recipe by David :)


Honorary Post: David can cook!!! :)

Sorry for the delay in posting. I was having trouble with my Google account and I couldn't upload images anymore. Problem resolved, time for posting! :)

As many of you know, David, my husband, is not a cook. Ok, mind you, he can now fry an egg, do an egg sandwich, is the expert on waffles and shakes. But, don't you dare ask him more than that! Of course, he is a great helping hand when needed and since I get home pretty late at night, he helps with the prep required for dinner.

The other day, he prepared a whole meal for us on a Friday at lunchtime. I had bought some marinaded pork knuckles (inspired by my trip to Eastern Europe, which I really need to post here!) and since they need to cook for a good 2 hours, David was my lifesaver. He accomplished this recipe by himself, and followed my instructions perfectly. My husband is now a cook!

Roasted Pork Knuckles


Ingredients:

2 marinaded pork knuckles
4 potatoes
1 brocoli
4 garlic cloves
1/2 cup of white wine
1/2 onion
oil
salt and pepper

Since David cooked, he did not take pictures of the process but it is pretty straight forward. One thing at a time! ;)

Preheat your oven at 180C.

Take the knuckles and place them in an oven dish.

Peel the potatoes and dice them.

Slice the onion and garlic.

Surround the meat with the potatoes, onion and garlic.

Add some oil, salt and pepper and mix well together.

Cook for about 1 1/2 hour - 2 hours.

15 minutes before it is done, add the slice brocoli to the dish.

And here is the result!


It was so delicious and it felt great to eat such an amazing dish made by David.

Tuesday, 20 March 2012

A Little Piece of Canadian Heaven

As some of us Canadians miss our national roots, here is a little piece of our Canadian heritage :) Tire d'érable / Maple Taffy :)

Maple Taffy, for the non canadian ones reading my blog, is boiled maple syrup until it reaches a caramel texture. It is then served on snow and using a wooden stick rolled in order to make a lollipop.

Obviously, this sweet is usually served in the Spring time when the maple syrup production is in full gear. Maple syrup is made for the starch that the maple trees store during the winter period and is converted into sugar when the sap rises in the Spring. You collect the maple "water" making a hole in the tree and after a evaporation process, you get maple syrup. If you keep the boiling process going, you get taffy and if you continue, the taffy turns into sugar. Each one of these natural sweets is simply amazing :)

Here is a picture of my mother actually in a maple grove.


So here goes my maple taffy recipe. Bear in mind that we live in Madrid. Snow is made out of crused ice. Still tasted great :)

Maple Taffy


Ingredients:

1L of maple syrup


In a saucepan, heat maple syrup until it forms bubbles. Cook for a few more minutes.


If you live in a wonderful country where you have snow, go outside and get a recipient of it. If not, crush some ice and fill a recipient :)


Using a spoon or a saucer, pour some taffy forming a line.


Wait until it cools down slightly and using a wooden stick, form a lollipop.


And there you have it. Natural Canadian flavor straight from your kitchen and super easy to make :)


Enjoy :)

Sunday, 18 March 2012

Glazed Duck

I really enjoy duck. It is probably because we have French heritage in Quebec that duck is such a common dish that can be found at typical Quebec / French restaurants. Since I found a whole one at Christmas time at the supermarket at a really good price, there was nothing stopping me :) I have already posted about the cider / beer duck legs so here a recipe for a glazed duck

Glazed Duck & Spinach Potatoes


Ingredients:

1 whole duck
4 oranges
1/4 cup balsamic vinegar
1/2 cup honey
1/4 cup maple syrup
4 potatoes
3 cups of chicken or duck broth
200grs frozen spinach
salt and pepper


Pre-heat oven at 160 degrees.

In a oven pan, place duck and salt and pepper. (You can see the neck on the picture which I used to make the duck broth to baste it).


Baste the duck with about 1 cup of broth and the juice of 2 oranges.

Cook the duck brest side up for 1 hour.


In the meantime, prepare the glaze. Mix together the honey, balsamic vinegar, maple syrup and the remaining orange juice.


Heat a pan and simmer the glaze until it becomes thick.


After the first hour of cooking, remove the duck and flip it over.

Baste with more broth.

Cook for another hour.
 
Glaze the duck and return to the oven to brown.


Remove some of the juices from the pan and reserve.

Peel and dice the potatoes.

In a large pan, heat some of the reserved duck juices.

Add the potatoes and cook.


Flip the duck around and glaze.

Return to oven to brown.


When the potatoes are starting to roast, add the frozen spinach.


While the duck is browning and the potatoes cooking, use the remaining duck juices and broth to make a sauce (using a roux).


The potatoes should be fine by then. Just look how amazing those look :)


Remove the duck from the oven and admire your masterpiece :)


Let rest for a few minutes in order for the juices to spread and start slicing.

Serve the duck with the potatoes and the gravy.

Enjoy :)

Sunday, 5 February 2012

Pre-Christmas Dinner Part 2:)

Ok, on to part 2: the main dish.

This is a dish my mom often makes and always is a crowd-pleaser. You cannot go wrong with this dish and it's great when entertaining: oven baked. And best of all: Red and green coloring for Christmas!

Pollo alla Fiorentina


Ingredients:

6 chicken breasts
breadcrumbs
2 cups marinara sauce
1/2 cup red wine
1 1/2 cup chicken broth
1 cup of round rice
1/4 cup black olives
2 packs of frozen spinach
1 pack of ricotta cheese
2 eggs
1/2 cup parmesan cheese
butter
oil
salt and pepper

Preheat oven at 180C.

Coat the chicken breasts with seasoned breadcrumbs (I usually put oregano, basil, parsley, garlic powder and black pepper).

In a large pan, heat some oil. When ready, add the chicken.


Remove from the pan and set aside.

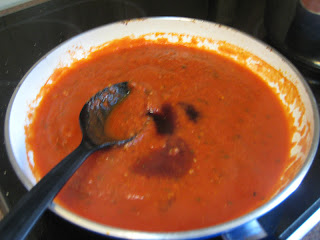
Combine the marinara sauce (tomato sauce with garlic, same seasoning as the breadcrumbs, garlic and a bit of sugar cooked during 15 minutes) and red wine.


Remove part of the mixture (about 1 cup) and set aside.

Add the broth, rice and sliced olives.


Bring to a boil and transfer to the oven dish.


Arrange chicken on top.


Cover with foil and cook for about 25 minutes in the oven.

In the meantime. squeeze the excess water from the spinach and combine the parmesan, ricotta, eggs and spinach together.


Mix well.


Remove chicken from the oven and place the spinach mixture on the sides of the dish.


Add the remaining marinara wine combination on top. Sprinkle some parmesan cheese on top and bake for another 15 minutes.

Remove from the oven and serve.


Doesn't it make for an awesome presentation :)

Enjoy :)